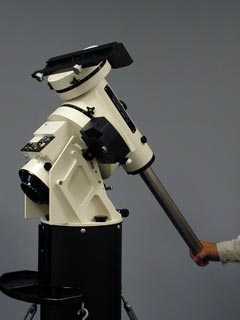
Adjustments to remove worm gear backlash on Mounts
Prior to 2005 without Bracket Upgrade
|
|
Backlash (as defined by Astro-Physics): Backlash is the result of a gap between the worm and the worm wheel. If movement can not be felt or seen in the eyepiece when making the following tests, the adjustments described here will not be needed. Play (as defined by Astro-Physics): The movement in an axis where there was none before. It can be felt as a back and forth movement of a gearing setup or seen as an image shift in the eyepiece where there should be none. |

|
Test for Right Ascension (R.A.) Backlash and correction
|
|
 |
Step 1 |
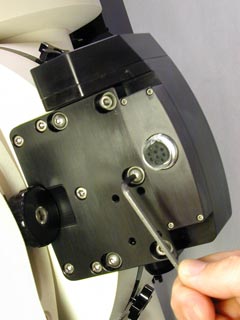 |
Step 2 |
 |
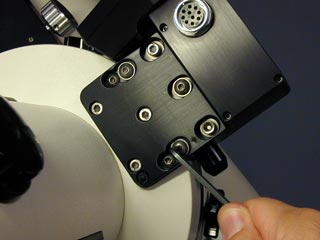
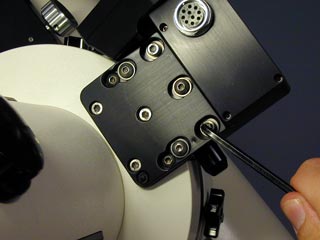
Step 3 Using a 5/32" long-arm hex key, loosen ONLY the one socket head cap screw shown. Once loosened, re-tighten with a moderate amount of torque. |
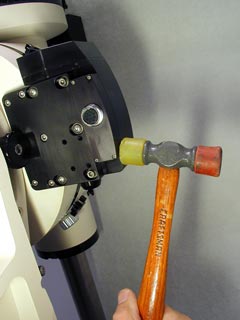 |
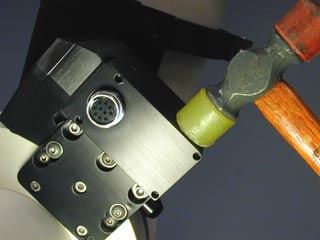
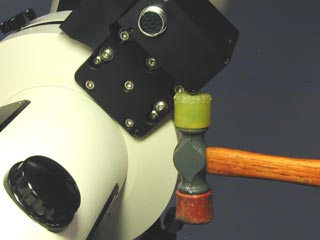
Step 4 Using a rubber mallet
(or steel hammer with a block of wood or plastic), gently tap the worm
housing as shown. This action moves the worm gear closer to the worm
wheel, which removes the gap that you felt earlier. |
 |
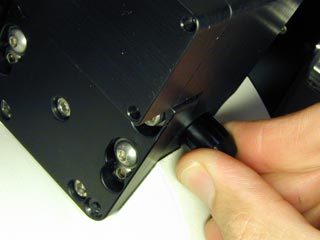
Step 5 Once the backlash is gone, re-tighten the socket head cap screw and remove the black thimble like cap, on the worm housing. |
 |
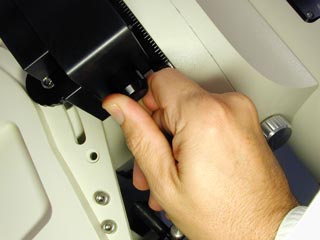
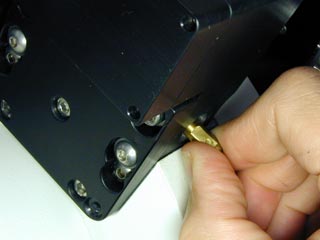
Step 6 After you have exposed the worm shaft extension, you should be able to turn it by hand or with a pair of pliers with tape over the jaws. If you can turn it, please proceed to step 7. If the worm shaft extension is tight, please proceed to step 8. |
|
Step 7 If the backlash is gone and the worm turns freely, re-tighten the 3 buttonhead screws and you are done. |
 |
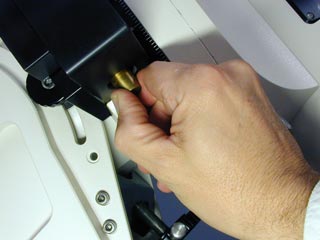
Step 8 To release excess pressure on the worm, re-loosen the one socket head cap screw with the
5/32" long-arm hex key and tap the worm housing on the worm shaft extension cap as shown. |
|
Test for Declination (Dec.) backlash and correction |
|
 |
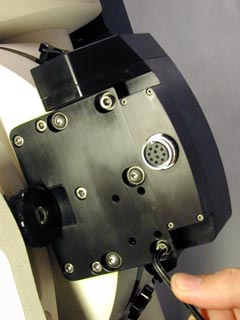
Step 1 |
 |
Step 2 |
 |
Step 3 Using a 5/32" long-arm hex key loosen ONLY the one socket head cap screw shown. Once loosened, re-tighten with a moderate amount of torque. |
 |
Step 4 |
 |
Step 5 Once the backlash is gone re-tighten the socket head cap screw and remove the black thimble like cap on the worm housing. |
 |
Step 6 After you have exposed the worm shaft extension, you should be able to turn it by hand or with a pair of pliers with tape over the jaws. If you can turn it, please proceed to step 7. If the worm shaft extension is tight, please proceed to step 8. |
|
Step 7 If the backlash is gone and the worm turns freely, re-tighten the 3 buttonhead screws and you are done. |
 |
Step 8 To release excess
pressure on the worm, re-loosen the one socket head cap screw with the
5/32" long-arm hex key and tap the worm housing as shown. |
Home
Back to Technical Support Index
Copyright © 2004, Astro-Physics, Inc. - All Rights Reserved
This page was last modified:
March 14, 2011
Astro-Physics, Inc.
11250 Forest Hills Road, Rockford, IL 61115, U.S.A.
Phone: 815-282-1513 Fax: 815-282-9847